INSTALLATION AND USER MANUALOF THE NODER MOBILE ACCESS APP

Check out what you will need:
Smartphone based on Android 8 and above
Activation code received from your the NODER access control system administrator
Internet access
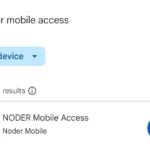
1. Download and install the NODER Mobile Access application
Open Google Play Store and search app “NODER Mobile Access”
or use the direct link to the Play Store with NODER Access Mobile app
or scan the QR code below.

Then install the application by clicking the “Install” button.
2. NFC settings
If NFC is not enabled in you smartphone you will see a message at the bottom of the home screen:
„Turn on NFC in system settings to use the application.” or similar.
Note: You can only turn on NFC communication if you want to use the application. It does not need to be on all the time.

3. Add a new card
To register a new or additional card in the application, click “ADD CARD” on the home screen, which will take you to a window where you will need to enter the activation code.
Alternatively, you can go to the “CARD” tab, and then click on the “+” icon in the bottom right corner, to add a card.

Enter the 20 character activation code provided by the administrator and press the “SEND” key.
If an incorrect activation code is entered, this will be signalled by the display of a message such as
“The attempt to authorise the card has failed” or similar.

After a few seconds, the card will be downloaded to the device and you will automatically be taken to the CARDS view.
Note: You must have an active Internet connection at the time of card activation.
The card contains information such as:
- name of the company to which the card belongs,
- card number that will be authorised in the NODER access control system,
- virtual card expiration date,
- current card validity status (the correct status is “active”)
To return to the home screen, press “START” in the tabs or swipe right on the screen.

4. Reading cards / Opening doors
To read the virtual card on the NODER Access Control reader, place the phone near the reader and wait for the signal on the reader.
Correct reading of the virtual card is also signalled on the start screen of the application by the icon, which only indicates that the card has been read correctly on the reader.
Note: The card can only be read again if the device is removed and placed back on the reader.
The virtual card number is sent to the controller which decides whether to grant access or not according to the local database and then signals the result on the reader.
green led – access granted,
blinking 3 times red led – access denied.
Note: If access has not been granted, contact your Access Control System Administrator and inform them.

If you do not have a virtual card or your card has expired, the following icon will be displayed on the application home screen:
5. App settings
- Enable/disable notification of incoming card expiry.
- Enable/disable card authorisation when the screen is locked.
Note that if the reader forces the phone to be unlocked, the option has a lower priority and the phone must always be unlocked. - When the phone needs to be unlocked, it will vibrate three times for a set time.
- Set the vibration time after the PAC has been successfully read on the reader.
- Set the time after which the card is read again.

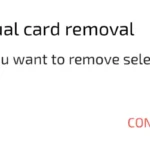
6. Card removal
To remove a card, go to the “CARDS” tab, and click the “Remove” button on the selected card:
The next step is to confirm the removal of the card:
v1.2 2025-03-27